Sometimes in our plight to fabricate the proverbial “better mousetrap”, we encounter snags that seem impassable. However, through research and persistence, we can progress from concept to success. This is my story, and I hope it helps anyone out there who may share a similar frustration as the one I had. I emphasize the word “had”, because it is now, and forevermore past tense for me. I know this post seems long, but read it in it's entirety as it is VERY informative. I've also attached lots of pictures for your viewing pleasure.
This is the problem- how do you fabricate a mold to cast melted lead pieces into? I know what you’re thinking, “It’s easy. Just make a 2 piece mold from a high temperature RTV silicone. Well, that works fine if you’re casting a small jig head, or something equal to or less than 4 ounces. High temp RTV can withstand about 560 degrees. The minimum melting point of lead is 621 degrees. However, if you tried to pour 625 degree lead into a mold, it will coagulate on you, and your pour will look horrible. You need to get the lead to about 700 degrees and preheat your mold to get a nice, cohesive pour.
Lead cools and solidifies very quickly, so a smaller piece will do less damage to the mold than a larger piece will. But there is still damage being done, and eventually the mold WILL wear out, and you WILL be forced to re-invest in the high temp silicone, and recast a new mold. Hopefully, it will be an exact replica of the 1st, but you can’t always guarantee it.
So here was my problem. I was trying to cast a custom shaped lead piece that weighs about 15 ½ ounces. This lead piece has been methodically and intentionally shaped to achieve a specific balance, weight distribution, and sink ratio. I will attach a picture of the finished piece so you can see what it looks like. You will think you yourself, “What the he** is that, and why is it shaped that way?” Well before you even ask yourself that question, I will give the answer. The lead piece will eventually be encapsulated by a casting resin (Flex 70) in the shape of a specified lure. The reason it’s so heavy is because it’s designed to be vertically jigged for deep water, ocean rockfish.
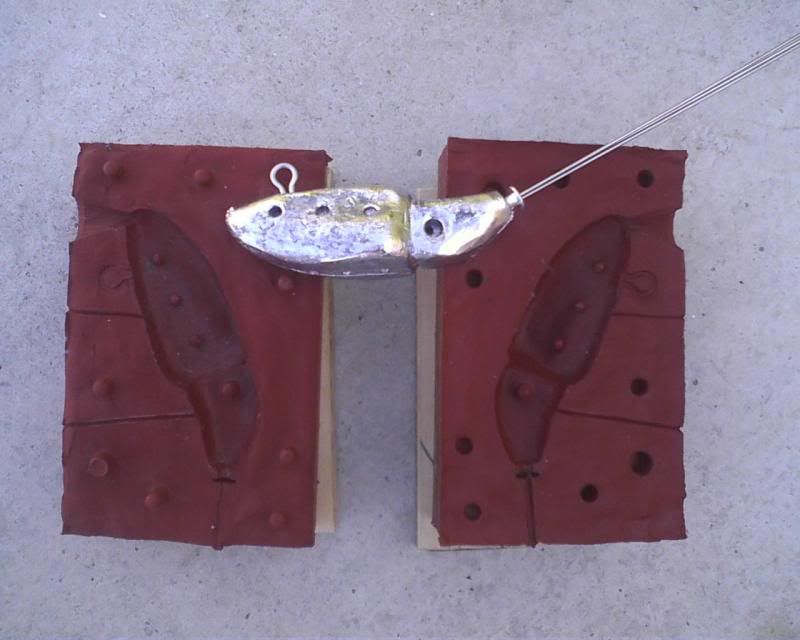
In my attempts to fabricate this mold, I tried several, cheaper methods. The first was just casting the lead piece straight into a High Temp silicone mold. The mold worked awesome for the first 2 or 3 pours, but quickly began to deteriorate thereafter. The interior began to crumble and slough off, and anywhere there was an undercut would do the same. The places where the mold was thinner were hit the hardest. High Temp silicone is pretty expensive. It cost me $56 for a quart of it at a local retailer here in San Diego. That was enough to make one, two piece mold. I had to make it extremely thick because of the size of the cast piece and the heat that would be induced by a huge chunk of molten lead. After realizing that this method wasn't financially feasible, I opted for alternative methods. Here is my first high temp silicone mold.
http://i32.photobucket.com/albums/d5/fo ... 4724f3.jpg
My next option was cheaper. It was plaster of paris. Plaster of paris can easily withstand the heat of molten lead. There are several drawbacks to plaster of paris though. The first is water retention. After your mold has set up, you need to bake it in an oven at 400 degrees for about 4 hours. This will eliminate the water in the mold. You will notice at the mold is about 85% lighter when you remove it from the oven. If you haven’t baked out all the water, when you pour hot lead into it, any remaining water will instantly vaporize and molten lead will erupt out of it like a volcano. NOT GOOD!
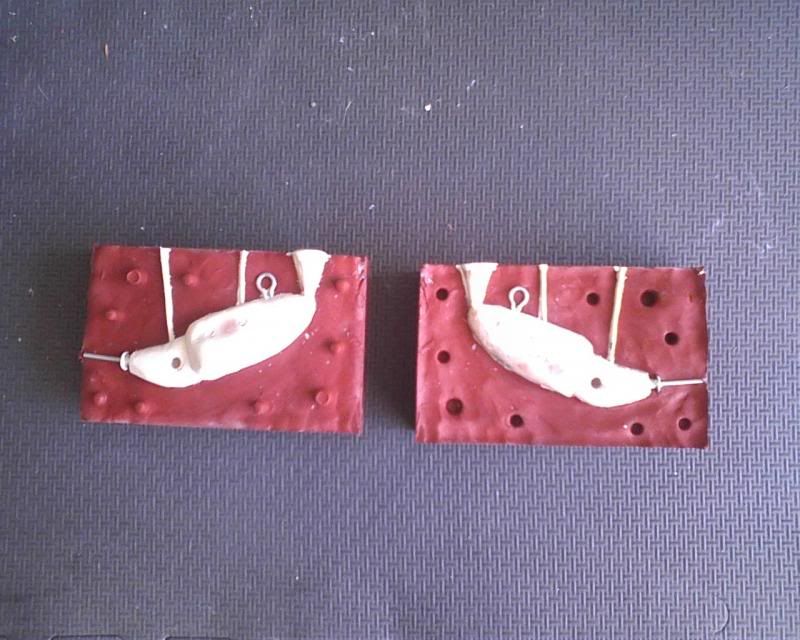
The second issue with plaster of paris is once it’s been properly baked it is VERY fragile. If the piece you’re trying to mold has any deep undercuts or has alignment dimples in it, they are more than likely going to break off. They way around this is to reinforce them. I reinforced the alignment dimples with small springs, and I layered the plaster of paris with shredded fiberglass. This is the equivalent of adding straw to mud bricks. It’s a binder that gives the plaster more rigidity. I’ve heard of people adding super fine silica sand as well, but nonetheless, your mold will still be fragile. I also painted mine with a thin layer of high temp spray paint. This is the stuff used to spray paint BBQ grills. It can withstand up to 1200 degrees. This would create a cohesive binder layer for the surface of the mold, as well as smooth out any imperfections. This mold worked for about 2 or 3 pours, then it just began to crumble. You have to clamp it shut, and this process in conjunction with the actual pour was just more than the mold could take. Here is a pic of the plaster of paris mold and the process I went through to prepare for the casting.
http://i32.photobucket.com/albums/d5/fo ... b601d4.jpg
http://i32.photobucket.com/albums/d5/fo ... e930ba.jpg
At this point I began to contemplate my first choice again- which was to have an aluminum mold machined for me. There is a reason that they make lead molds out of aluminum. Aluminum melts at 1220 degrees, so the molten lead will never get hot enough to damage it. Plus it’s SUPER durable. You can get an indefinite number of pours out of it. My motivation to go this route was quickly squelched again when I began researching the cost. I should have known this though- after all this wasn’t my first time contemplating going this route. I believe it was Albert Einstein who defined insanity as, “doing the same thing over and over, but expecting a different result”.
When I was in high school (20+ years ago), I took metal shop. This was my favorite class EVER! One of the projects we did in that class involved smelting aluminum and pouring it into a sand mold. There’s a very special sand you have to use to make this happen. It’s called “petrobond sand”. It’s a mixture of a fine sand and some sort of petroleum product. It’s pretty awesome stuff. What you have to do is make a wooden mold box, then place whatever piece you’re trying to cast into the bottom of the box. Then you pack the sand in around it and tamp it in VERY HARD. Once your sand is tamped in really hard, you can flip the mold over and extract the piece that you packed the sand around. Sounds pretty easy- so I thought.
First of all, I will ALWAYS lean towards the cheapest route. I did a little research (God bless YouTube) and found out how to make “greensand”. This is the homemade equivalent of the petrobond sand. It’s essentially a mixture of fine silica sand, bentonite clay, and water. Bentonite clay is essentially cat litter. The sand to clay ratio is 10:1. You very slowly add the water until you get the sand to a point where it holds its shape when squeezed, but breaks cleanly when you break the chunk. Easier said than done! This was a catastrophic failure. The sand was too course, and I added too much water. It just wouldn’t allow itself to hold its shape when tamped. Also, my wife got PISSED when she walked into the garage and saw me grinding the cat litter into powder with our $450 VitaMix blender. Oh well, back to the drawing board.
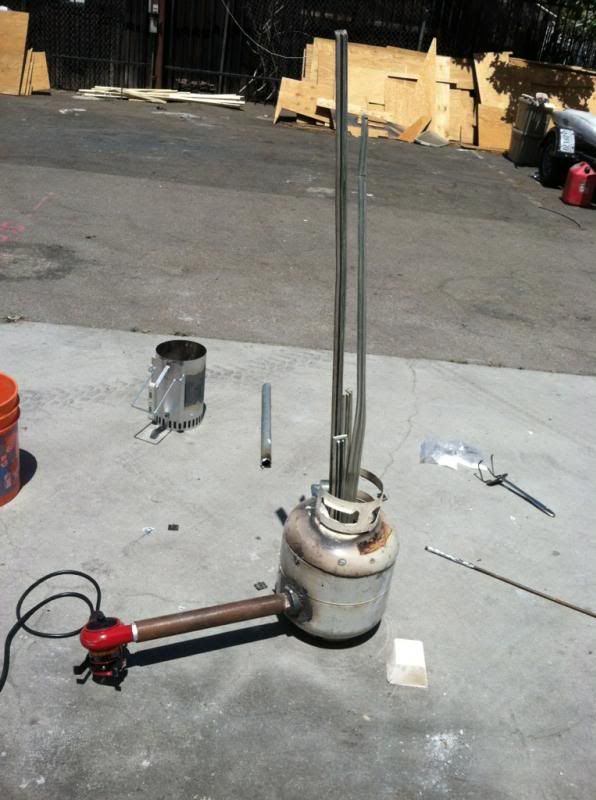
Simultaneously I had to come up with a way to smelt down aluminum. This process went much better than the mold casting portion. I took an old, empty propane cylinder and removed the valve. I washed it out 3 times to remove any residual propane and vapors. I then cut off the top at approximately 11” from the bottom with a reciprocating saw. I cut a hole near the bottom of the tank and inserted a thick steel pipe. The hole was slightly elongated so the pipe could be angled to follow the curvature of the inside of the tank, and then welded it in place. It doesn’t have to be welded, but I just wanted to ensure it wouldn’t move at all. The angle of the pipe is designed to maximize circulation of air. I bought some refractory cement called Mizzou Plus. It can withstand temperatures up to 3000 degrees. I poured a 3” layer in the bottom of the tank, then with the use of an 8” cardboard tube, I lined a 2” thick layer of refractory around the inside of the tank. I then repeated this process with the top of the tank which was to become the lid. The concept is this: You put a layer of hot charcoal in the bottom of the foundry. You then place your crucible (in my case a thick section of steel pipe with a steel plate welded to the bottom) inside of it and pack more hot coals around it. Then you place the lid on top, and force air through your pipe with a hair dryer or heat gun. It only takes about 10 minutes before the inside of your foundry is glowing red hot. Then you start dropping aluminum into the charge hole thru the top of the lid. After your aluminum is molten, you will have to degas it and add a flux to get all the impurities out of it. This is done by adding a teaspoon of Low Salt (yes- I said Low Salt) and a teaspoon of soda wash (which is just baking soda baked at 400 degrees for ½ an hour until all the moisture and other stuff is baked off of it) to the molten aluminum right before you’re ready to pour it. This will allow all the slag to come to the top to be scraped off. Here are pics of the foundry and me melting aluminum in it.
http://i32.photobucket.com/albums/d5/fo ... 7e678d.jpg
http://i32.photobucket.com/albums/d5/fo ... 4655a3.jpg
So back to the mold- I finally realized that I was going to have to suck it up and buy the good sand. I found a guy on E-Bay who sold me 35#’s of petrobond sand for $50 (shipping and tax included). So now I had all the elements I needed for a successful casting…. So I thought!
My first attempt to make a mold with the petrobond was a failure. This was because I was trying to tamp the petrobond sand around my high temp silicone mold. The high temp silicone is really rigid, but it still has flex. This prevented me from getting a good blank cast from it in the sand. BACK TO THE DRAWING BOARD AGAIN!!!!
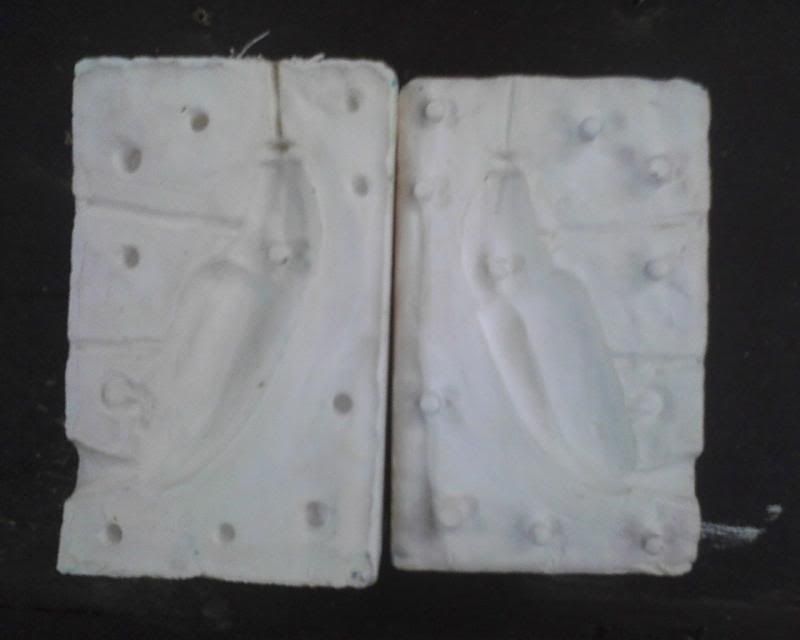
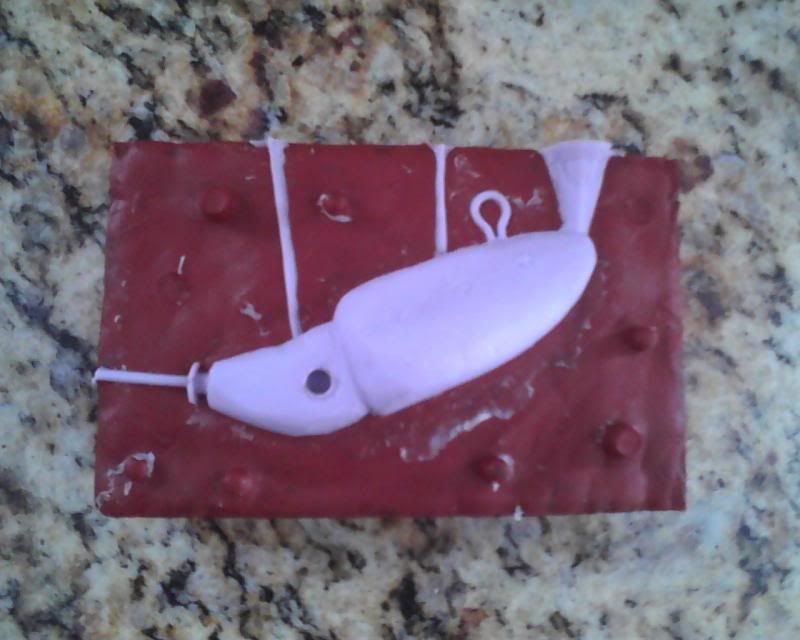
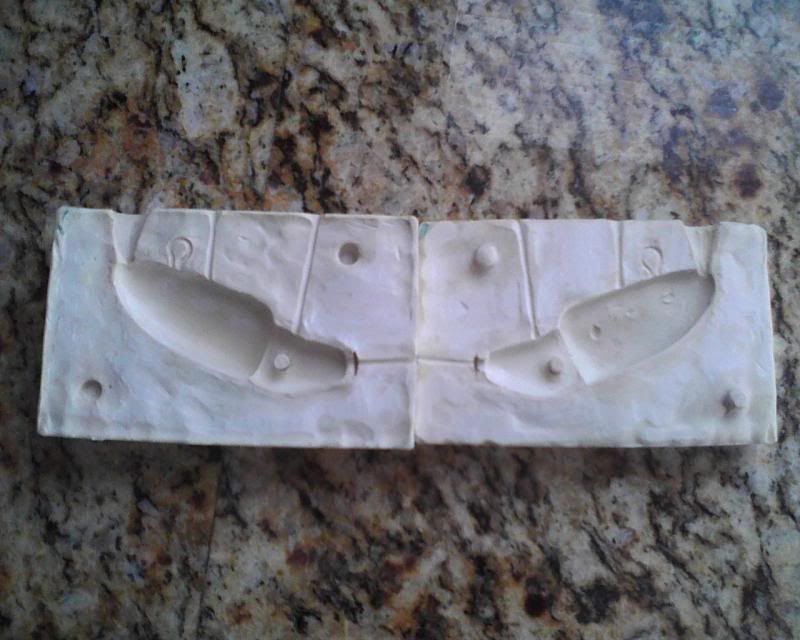
I realized I was going to have to make my sand cast from something more rigid. Thank God for Alumilite super plastic. So what I had to do was this: First I has to take both halves of my original high temp silicone mold, and spray the inside thoroughly with mold release. Then I had to fill the cavity with RTV silicone and let it cure. The only way I could do this was to pour the RTV silicone in both halves (making sure all small details and undercuts were filled), then quickly place the mold halves back together and clamp the mold shut. The silicone is VERY viscous, so it won’t pour out of the mold cavity in the time it takes for you to combine the 2 halves. Once the silicone was cured, I separated the halves to reveal a perfect replica of the cast piece (sprue hole, vent holes, and all). By leaving this in place, and building up a mold box around it, I was able to cast a perfect mold out of super plastic, which is SUPER HARD, and can easily withstand the tamping process of the sand and still maintain its rigidity. Here is a picture of the high temp silicone mold with the silicone cast piece inside of. I've also attached a picture of the super plastic mold I made from the silicone mold. You will notice that on the super plastic mold I removed most of the alignment dimples. The less small details and undercuts you can add, the better (even with the right sand and mold making materials).
http://i32.photobucket.com/albums/d5/fo ... 890f02.jpg
http://i32.photobucket.com/albums/d5/fo ... e4b390.jpg
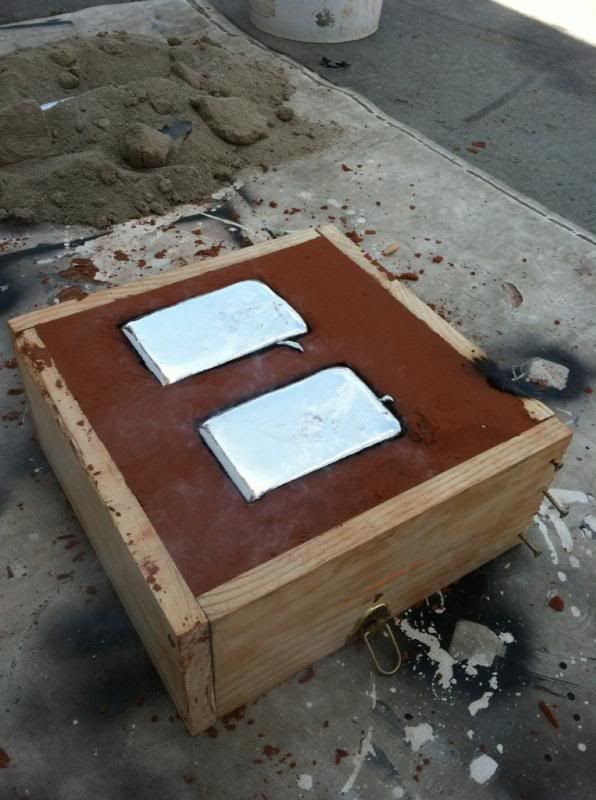
Now that I had everything ready, it was time to cast. I made a perfect mold in the sand, fired up the foundry, and melted about 5 pounds of aluminum. I’m pretty fortunate that where I work we have LOTS of clean scrap aluminum for me to use. However, aluminum cans will work just fine. You will just need a bunch of them, but eventually you will get a molten pool of aluminum in your crucible. After 15 minutes of smelting, I made the pour. Here is a picture of the aluminum mold cooling in the petrobond sand.
http://i32.photobucket.com/albums/d5/fo ... 998de5.jpg
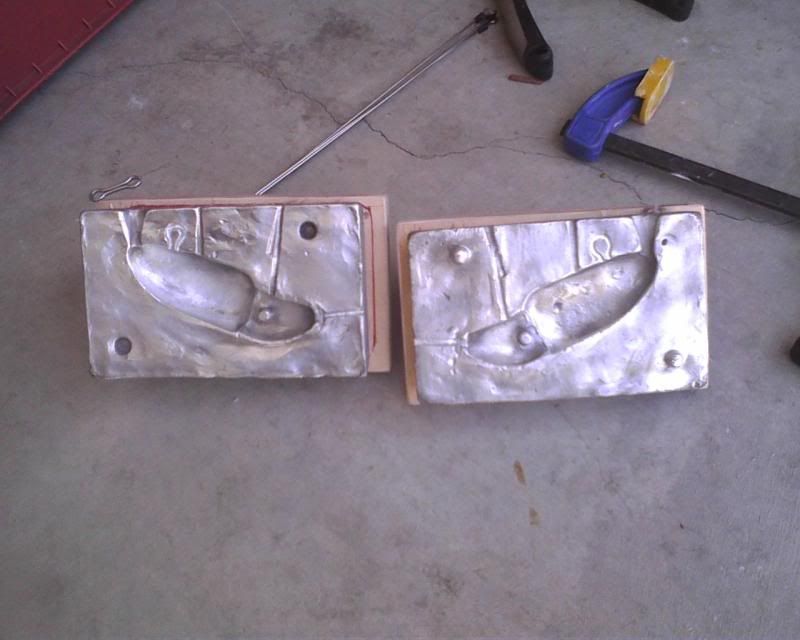
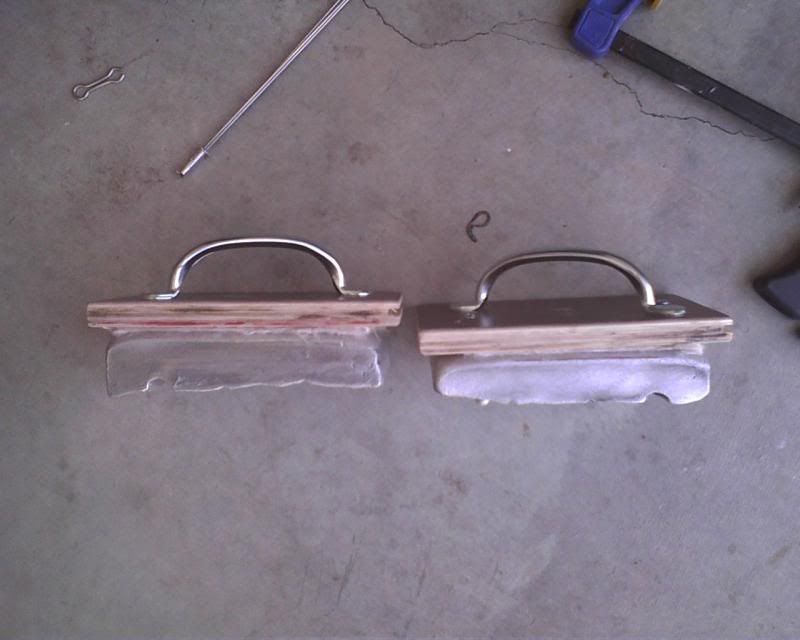
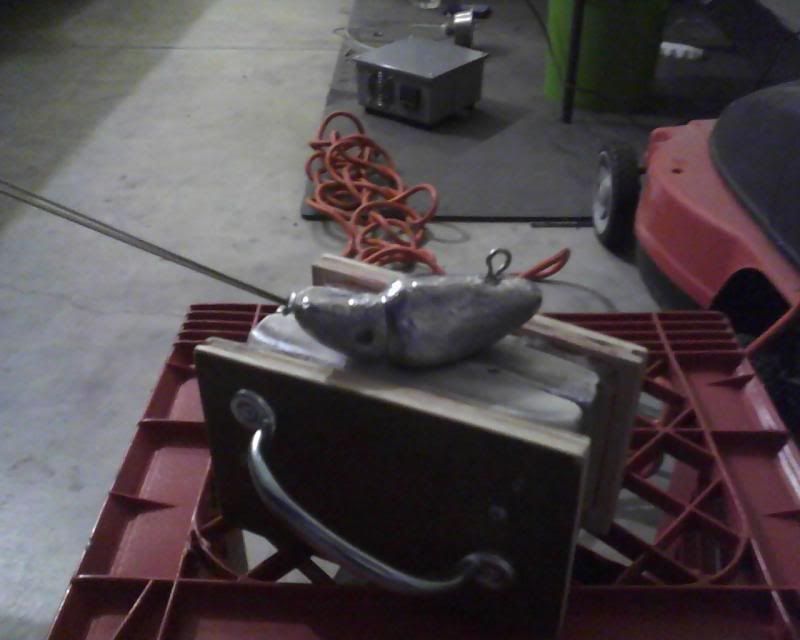
After they cooled to the touch, I extracted them and cleaned them up with a wire wheel on my drill. I used a Dremel and a very small carbide bit to clean up any small details that were missed in the casting that accommodate my inserts. Then I sandwiched sever layers of fiberglass blanket between the outside of the mold and a piece of leftover hardwood flooring cut to size. Aluminum molds get HOT when you pour lead into them, and I wanted to be able to touch the mold to extract my cooled piece. I also didn’t hinge the mold because some of the details prevent the mold from separating with a hinge on one end. It needs to be separated straight out. I also added a handle for leverage when pulling the mold apart. Oh yeah, I forgot to add this little note- you can use the petrobond sand over and over and over again. Here are the pictures of the finished product.
http://i32.photobucket.com/albums/d5/fo ... dd3858.jpg
http://i32.photobucket.com/albums/d5/fo ... 1dbd15.jpg
http://i32.photobucket.com/albums/d5/fo ... be7020.jpg
The beauty of creating my own aluminum mold and going this route is this: Now I have all the materials to replicate this process in the future. I also have the experience via trial and error to make a successful cast the 1st time around next time. And each time I make an aluminum mold, it will last indefinitely. Here is the amount of money I spent on the NECESSARY materials I used.
Old propane tank- FREE
Refractory cement- $50
Petrobond sand- $50
Wood for mold box- FREE
Pipe for air into foundry- FREE
Aluminum- Free
Silicone- (not sure if I should add this to the cost, because I cast the piece a long time before I decided to go this route, and I still had ample supplies to accomplish the task)
Super Plastic- $30
So $130 for a lifetime, aluminum mold making investment is a pretty good deal to me. I hope you guys enjoyed this, and I hope it inspired you to make your own foundry and aluminum molds.
Lastly, I wanted to add a picture of the final product with the casting resin on it, but I've been waiting to find out if there will be another lure build off first. I don’t want to disclose it until the right time. However, if Larry or Mike has decided that the lure contest isn’t going to happen anymore, I will post up a picture of the final product.
Take care guys, and fabricate your hearts out!
Homemade aluminum mold (picture HEAVY)
3 posts
• Page 1 of 1
Homemade aluminum mold (picture HEAVY)
![]() by Fomen38 » Tue May 13, 2014 10:23 am
by Fomen38 » Tue May 13, 2014 10:23 am
Last edited by Fomen38 on Tue May 13, 2014 6:37 pm, edited 2 times in total.
- Fomen38
- Posts: 92
- Joined: Sat Jan 26, 2013 10:03 am
Re: Homemade aluminum mold (picture HEAVY)
![]() by dahlberg » Tue May 13, 2014 11:08 am
by dahlberg » Tue May 13, 2014 11:08 am
Great post, thanks for sharing. You are a very dedicated angler!
best
L
best
L
Larry Dahlberg
The Hunt For Big Fish
The Hunt For Big Fish
-

dahlberg - Site Admin
- Posts: 5279
- Joined: Wed Oct 11, 2006 7:49 pm
- Location: Taylors Falls, Minnesota
Re: Homemade aluminum mold (picture HEAVY)
![]() by warpsyrhead » Tue May 13, 2014 1:32 pm
by warpsyrhead » Tue May 13, 2014 1:32 pm
I laughed when you were busted by your wife in the garage, I picture you saying "it's not what it looks like!". This is a great read - thanks for sharing!
- warpsyrhead
- Posts: 59
- Joined: Mon Apr 28, 2014 1:19 pm
- Location: Twin Cities, MN
3 posts
• Page 1 of 1
Who is online
Users browsing this forum: No registered users and 65 guests