http://i273.photobucket.com/albums/jj23 ... cc59d3.jpg
http://i273.photobucket.com/albums/jj23 ... d558ea.jpg
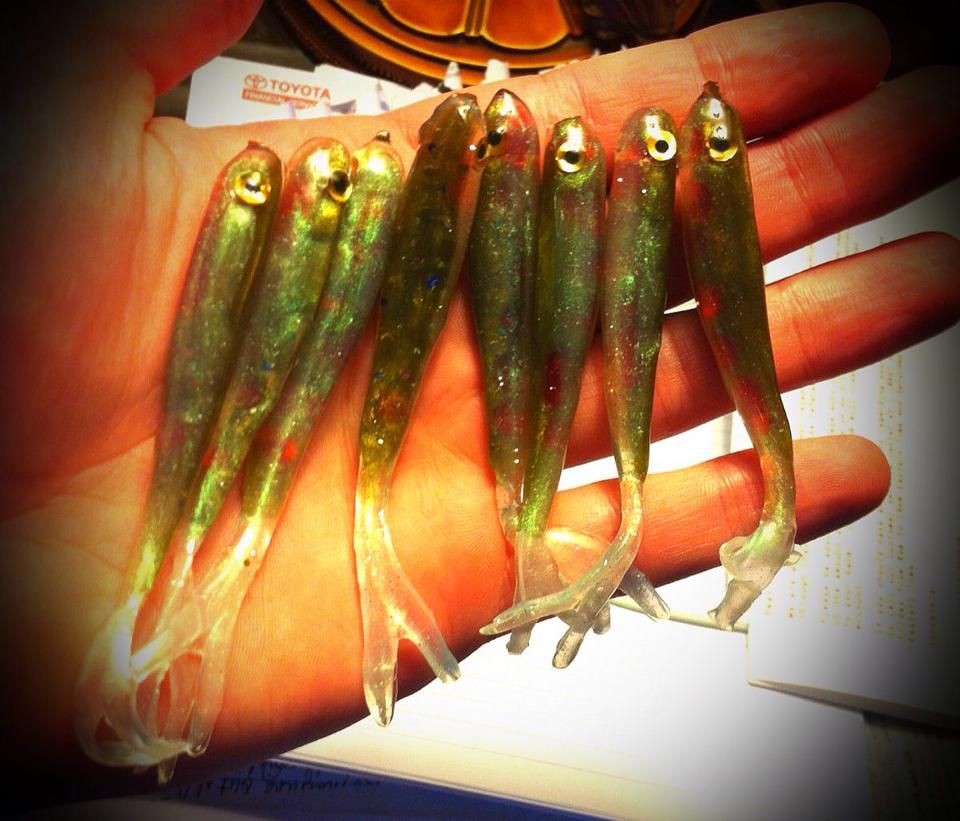
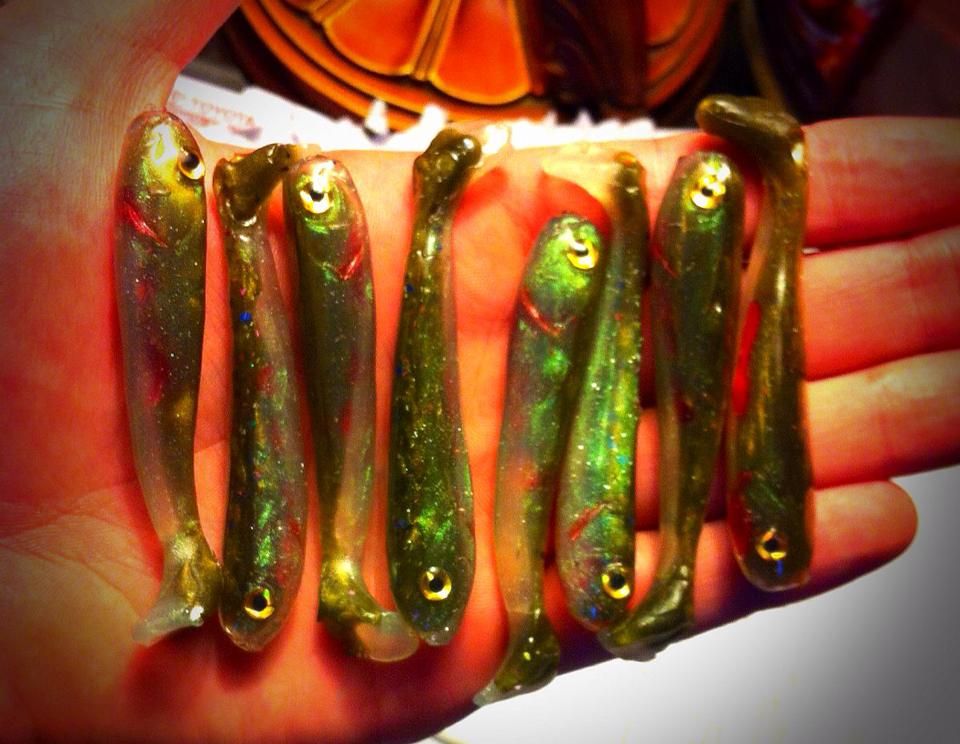
This is a local "Golden Roach" pattern I made. It's a go to bait in my area. Sorry if the pics aren't very clear they look AWESOME in person.
So i figured out a technique. I had a guy I was ordering baits from who would layer plastic to color his baits instead of painting them. In certain situations I prefer to paint, but there are other situations that I think the more "layered" look is better. Especially when trying to make colors transition seamlessly. Took me a lot of trial and error, but I'll share the secret (probably not so secret but I just figured it out) with you guys.
I take some Pearl/Green pigment colored plastic, pour a decent amount in my mold (top pour) and i begin rocking the mold to get a thin layer on the entire interior of the mold.
To add some bleeding spots, i made a Red/pearl plastic mix with some micro red flake and let a few drips on the the inside of the plastic skin. When i put the darker color as the "filler" the red spots show up brilliantly.
I then take any darker pigment plastic and fill the mold the rest of the way. IN the past i was really able to tell where one color began and one color ended and sometimes the plastics wouldn't adhere to eachother if the layers were too thick. By creating a thin "skin" of the pearl pigment plastic, the temperature of the plastic i use to fill the mold allows for the two colors to adhere. Play around with it if you guys want and share some pics if you try it.
Layering Plastic Technique
10 posts
• Page 1 of 1
Layering Plastic Technique
![]() by RhettWheeler » Fri Feb 21, 2014 9:25 am
by RhettWheeler » Fri Feb 21, 2014 9:25 am
"Fear not the man who knows 10,000 kicks but has practiced them one time. Fear the man who knows one kick and has practiced it 10,000 times."
- RhettWheeler
- Posts: 514
- Joined: Thu Apr 14, 2011 5:42 pm
Re: Layering Plastic Technique
![]() by rocko » Fri Feb 21, 2014 9:21 pm
by rocko » Fri Feb 21, 2014 9:21 pm
Rhett,
Thanks for sharing, they look awesome! Just finishing my own whiggley mold this weekend, after some optimistic prototyping last summer. Your pouring and other glitter tips will come in handy and are appreciated. Hope to add a few photos of my own soon.
Rocko
Thanks for sharing, they look awesome! Just finishing my own whiggley mold this weekend, after some optimistic prototyping last summer. Your pouring and other glitter tips will come in handy and are appreciated. Hope to add a few photos of my own soon.
Rocko
- rocko
- Posts: 22
- Joined: Wed Jan 27, 2010 9:33 pm
Re: Layering Plastic Technique
![]() by RhettWheeler » Sat Feb 22, 2014 1:29 pm
by RhettWheeler » Sat Feb 22, 2014 1:29 pm
rocko wrote:
> Rhett,
> Thanks for sharing, they look awesome! Just finishing my own whiggley mold
> this weekend, after some optimistic prototyping last summer. Your pouring
> and other glitter tips will come in handy and are appreciated. Hope to add
> a few photos of my own soon.
>
> Rocko
Glad to see you're tackling the whiggley too! Thanks for the kind words man, i'm figuring out this whole soft plastics thing one day at a time. I make everything that I like to fish with and it was nice to not have to purchase any soft baits last summer. Very refreshing to catch everything on lures I spent the time to make. Talk about a practical skill, am I right? Please do post some pictures asap I'd love to check out your work and even trade up on some plastics some day
"Fear not the man who knows 10,000 kicks but has practiced them one time. Fear the man who knows one kick and has practiced it 10,000 times."
- RhettWheeler
- Posts: 514
- Joined: Thu Apr 14, 2011 5:42 pm
Re: Layering Plastic Technique
![]() by rocko » Sat Feb 22, 2014 10:37 pm
by rocko » Sat Feb 22, 2014 10:37 pm
Rhett,
Patience please,will post a few photos when completed. I have been a bit clumsier with soft plastics vs the hard baits. Don't seem to fish with anything but a homemade lure nowadays. Much more satisfying catching them on your own creations.
Trying a new twist with this whiggley. Following the Advanced Tutorial but pouring the head separately with a harder plastisol to try and toughen up the bait a bit. Also trying a new rigging, which I will detail out if it works good. Not trying to tease, just want to make sure it is solid before spilling the beans! Bought some extra fine glitter at the local craft store today, hoping it works out.
Rocko
- rocko
- Posts: 22
- Joined: Wed Jan 27, 2010 9:33 pm
Re: Layering Plastic Technique
![]() by rocko » Tue Feb 25, 2014 8:54 pm
by rocko » Tue Feb 25, 2014 8:54 pm
http://s1252.photobucket.com/user/rocky ... sort=3&o=2
http://s1252.photobucket.com/user/rocky ... sort=3&o=3
http://s1252.photobucket.com/user/rocky ... sort=3&o=0
http://s1252.photobucket.com/user/rocky ... sort=3&o=1
Rhett,
Here's a few photos of my progress. The mold is done, and one whiggley has been spawned. I am trying to mold the head first, with hard plastisol for durability. I am using nylon binder clips for the eyes, one of which is shown on the mold for reference. I am using brass wire starting with the attachment loop, going around the binder clip, down to the hook attachment eye, which then comes back and wraps around the wire again at the beginning. Trying to make a solid attachment setup that will be tuneable, but hopefully solid enough to last for a few catches.
I poured the body last, with the soft plastisol. A small cavity in the head, from the shrinkage from the head pour, I think helped the two plastics adhere. It seems solid enough.
Next step will be making them a bit more polished, and coordinating the colors better. I will add some finger nail polish to finish off the eyeballs on the binder clips. I hope the river behind my house thaws out soon for a test drive. My prototypes worked well last summer, so I am confident he will whiggle away.
Rocko
- rocko
- Posts: 22
- Joined: Wed Jan 27, 2010 9:33 pm
Re: Layering Plastic Technique
![]() by rocko » Tue Mar 04, 2014 8:23 pm
by rocko » Tue Mar 04, 2014 8:23 pm
Rhett,
http://s1252.photobucket.com/user/rocky ... sort=3&o=0
Whiggles no. 2, and this time I didn't use remelted plastic and coordinated the head and tail better. I have some catching up to do but a fun start. Néed to get some of those markers for some detail and some more alumidust to work with the glitter.
Rocko
- rocko
- Posts: 22
- Joined: Wed Jan 27, 2010 9:33 pm
Re: Layering Plastic Technique
![]() by RhettWheeler » Wed Mar 05, 2014 11:18 am
by RhettWheeler » Wed Mar 05, 2014 11:18 am
Looks great rocko. U going to use that small loop under the chin as a hook hanger?
-Rhett
-Rhett
"Fear not the man who knows 10,000 kicks but has practiced them one time. Fear the man who knows one kick and has practiced it 10,000 times."
- RhettWheeler
- Posts: 514
- Joined: Thu Apr 14, 2011 5:42 pm
Re: Layering Plastic Technique
![]() by rocko » Wed Mar 05, 2014 7:41 pm
by rocko » Wed Mar 05, 2014 7:41 pm
Yes, that is my plan for testing. The brass wire runs from the nose to the binder post for the eyes, down to the hook hanger, and back up to the front and wrapped around again. The pull on the hook hanger then gets distributed down two shafts and feels solid to me. I think the harder plastisol head will help with durability also.
Rocko
Rocko
- rocko
- Posts: 22
- Joined: Wed Jan 27, 2010 9:33 pm
Re: Layering Plastic Technique
![]() by RhettWheeler » Fri Mar 07, 2014 11:32 am
by RhettWheeler » Fri Mar 07, 2014 11:32 am
Sounds pretty good what will you be fishing for mostly?
"Fear not the man who knows 10,000 kicks but has practiced them one time. Fear the man who knows one kick and has practiced it 10,000 times."
- RhettWheeler
- Posts: 514
- Joined: Thu Apr 14, 2011 5:42 pm
Re: Layering Plastic Technique
![]() by rocko » Fri Mar 07, 2014 9:48 pm
by rocko » Fri Mar 07, 2014 9:48 pm
I chase after muskies. This whiggley is 10 inches long.
- rocko
- Posts: 22
- Joined: Wed Jan 27, 2010 9:33 pm
10 posts
• Page 1 of 1
Who is online
Users browsing this forum: No registered users and 149 guests